How to Use GearGen.XYZ
Spur Gear Calculator
Helical Gear Calculator
Herringbone Gear Calculator
Planetary Gear Train Calculator
Rack & Pinion Calculator
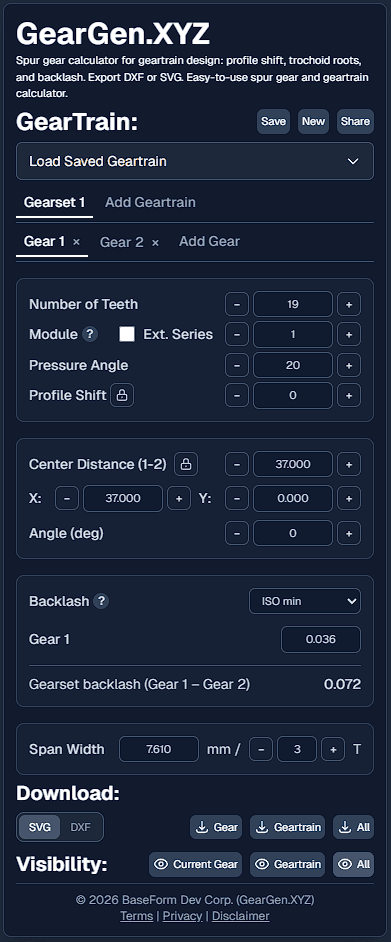
Spur Gear Calculator
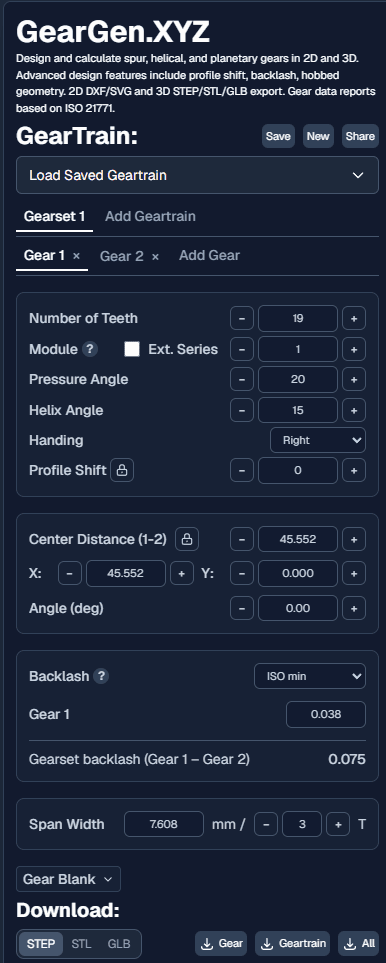
1. Add a Gear
Press Add a Gear to add a gear to the current gearset.
The new gear meshes with the previous gear in the gearset.
For gear 3 and above, use Driving Gear to choose the mesh partner.
2. Add a GearTrain
Press Add a GearTrain to add another reduction stage.
The new stage gets a shaft link to the last gear in the previous gearset.
If you need a different link, change the shaft connection gear.
3. Edit the Current Gear
Underlined tabs show the geartrain and gear you edit:  and
and  .
.
4. Edit the Basic Gear Parameters
The hob cutting tool forms the gear geometry.
Set number of teeth, module, pressure angle, and profile shift.
Module sets tooth size. Profile shift sets tooth thickness.
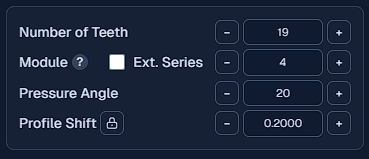
a. Number of teeth
Set the number of teeth. Type a value in the box.
Use the + or - buttons to change the value. The minimum is 10T.
b. Module
Set the module. Type a value in the box.
Use + or - to step through the common modules.
Series I modules show by default.
Check Ext. Series to show Series I and Series II modules.
c. Pressure Angle
The default pressure angle is 20°.
Use + or - to choose a common value: 14.5, 15, 20, 22.5, 25, 30.
Type any other value to set a custom pressure angle.
d. Profile Shift
Set the profile shift. Type a value in the box.
Use the + or - buttons to change the value.
Limits block undercutting and pointed tooth tips.
If you exceed a limit, the control shows a prompt.
Profile shift and center distance update each other.
If you edit center distance, use the lock button to hold profile shift.
Enter a span measurement to set profile shift for reverse engineering.
5. Set the Gearset Position
Set center distance, X position, Y position, and angle for the gearset.
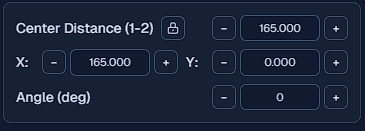
a. Center Distance
Change the center distance in the box, or use + or -.
When you change it, choose how to adjust profile shift: all pinion, all gear, or split.
If center distance is locked, the sum of profile shifts stays constant.
If you increase one gear profile shift, the other gear decreases.
b. X - Y Position
Set the X or Y position of the gearset. Type a value in the box.
Use the + or - buttons to change the value.
The tool adjusts the other axis to keep center distance constant.
c. Angle
Set the gearset angle. Type a value in the box.
Use the + or - buttons to change the value.
Center distance stays constant. The tool adjusts X and Y.
6. Select Backlash
Choose a recommended backlash value, or choose Own Input.
With Own Input, set backlash for each gear.
See Backlash for the calculation method.
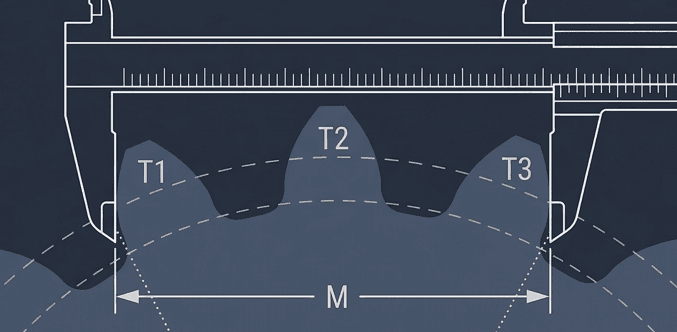
7. Set Gear Span Measurement
Span measurement checks tooth thickness.
Change profile shift to change the span value.
Enter a span value to set profile shift.
Use this for reverse engineering and inspection.
The tool sets the tooth count to the best default.
You can change the tooth count inside the valid range.
If the tooth count is outside the range, the control shows a prompt and moves to the nearest valid value.
8. Download
Download SVG or DXF from this panel.
Choose the selected gear, the selected gearset, or all gears in the viewer.
Gear Blank is under development. It has basic features only.
Helical Gear Calculator
1. Add a Gear
Press Add a Gear to add a gear to the current gearset.
The new gear meshes with the previous gear in the gearset.
For gear 3 and above, use Driving Gear to choose the mesh partner.
2. Add a GearTrain
Press Add a GearTrain to add another reduction stage.
The new stage gets a shaft link to the last gear in the previous gearset.
If you need a different link, change the shaft connection gear.
3. Edit the Current Gear
Underlined tabs show the geartrain and gear you edit: and .
4. Edit the Basic Gear Parameters
The hob cutting tool forms the gear geometry with ISO 21771 normal-system inputs.
Set number of teeth, normal module, normal pressure angle, helix angle, Handing, and profile shift.
These controls set tooth size and tooth thickness.
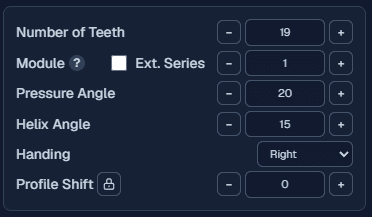
a. Number of teeth
Set the number of teeth. Type a value in the box.
Use the + or - buttons to change the value. The minimum is 10T.
b. Module
Set the normal module (mₙ). Type a value in the box.
Use + or - to step through the common modules.
Series I modules show by default.
Check Ext. Series to show Series I and Series II modules.
c. Pressure Angle
The default normal pressure angle (αₙ) is 20°.
Use + or - to choose a common value: 14.5, 15, 20, 22.5, 25, 30.
Type any other value to set a custom pressure angle.
d. Helix Angle
Set the helix angle β. Type a value in the box.
Use the + or - buttons to change the value.
Helix angle sets transverse module, transverse pressure angle, diameters, and center distance.
e. Handing
Choose Left or Right hand.
Mating external gears need opposite hands so the flanks mesh.
f. Profile Shift
Set the profile shift. Type a value in the box.
Use the + or - buttons to change the value.
Limits block undercutting and pointed tooth tips.
If you exceed a limit, the control shows a prompt.
Profile shift and center distance update each other.
If you edit center distance, use the lock button to hold profile shift.
Enter a span measurement to set profile shift for reverse engineering.
5. Set the Gearset Position
Set center distance, X position, Y position, and angle for the gearset.
a. Center Distance
Change the center distance in the box, or use + or -.
When you change it, choose how to adjust profile shift: all pinion, all gear, or split.
If center distance is locked, the sum of profile shifts stays constant.
If you increase one gear profile shift, the other gear decreases.
b. X - Y Position
Set the X or Y position of the gearset. Type a value in the box.
Use the + or - buttons to change the value.
The tool adjusts the other axis to keep center distance constant.
c. Angle
Set the gearset angle. Type a value in the box.
Use the + or - buttons to change the value.
Center distance stays constant. The tool adjusts X and Y.
6. Select Backlash
Choose a recommended backlash value, or choose Own Input.
With Own Input, set backlash for each gear.
See Backlash for the calculation method.
7. Set Gear Span Measurement
Span measurement checks tooth thickness.
Change profile shift to change the span value.
Enter a span value to set profile shift.
Use this for reverse engineering and inspection.
The tool sets the tooth count to the best default.
You can change the tooth count inside the valid range.
If the tooth count is outside the range, the control shows a prompt and moves to the nearest valid value.
8. Download
Download STEP, STL, or GLB from this panel.
Choose the selected gear, the selected gearset, or all gears in the viewer.
Gear Blank is under development. It has basic features only.
Herringbone Gear Calculator
The herringbone calculator uses the same ISO 21771 normal-system inputs as the helical calculator. It is 3D only (STEP, STL, and GLB). Each gear is two opposite-hand helixes that meet at mid-face (half of face width b). There is no split control.
Helix angle β and handing apply to the first half of the face. The other half is always the opposite hand. Consecutive gears still alternate first-half handing so they mesh.
Axial force cancels. Download and report controls match helical, except 2D DXF/SVG is not offered.
Planetary Gear Train Calculator
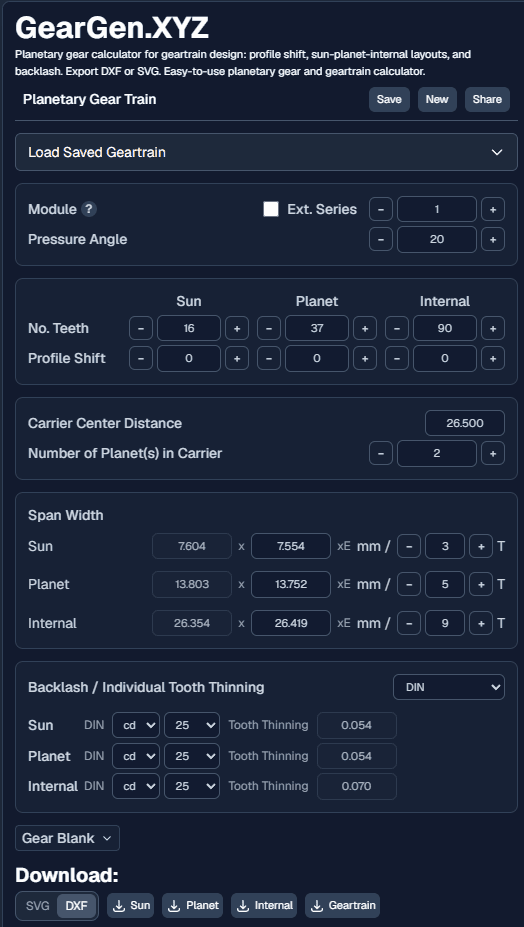
1. Set Shared Module and Pressure Angle
Module and pressure angle are shared across the Sun, Planet, and Internal (ring) gears.
Change either value to update the whole planetary set.
a. Module
Set the module. Type a value in the box.
Use + or - to step through the common modules.
Series I modules show by default.
Check Ext. Series to show Series I and Series II modules.
b. Pressure Angle
The default pressure angle is 20°.
Use + or - to choose a common value: 14.5, 15, 20, 22.5, 25, 30.
Type any other value to set a custom pressure angle.
2. Set Sun, Planet, and Internal Teeth and Profile Shift
Enter data in three columns: Sun, Planet, and Internal.
Set tooth counts and profile shifts for each gear.
Tooth counts stay linked by default so Internal teeth match Sun and Planet (z3 = z1 + 2z2). Unlink them to set a reduced planet count z2 < (z3 − z1)/2, then choose a meshing case so profile shifts keep the set coaxial.
a. No. Teeth
Set the number of teeth for Sun, Planet, and Internal.
Type a value in each column, or use + or -.
b. Profile Shift
Set the profile shift for each gear.
Profile shift and carrier center distance update each other.
Limits block undercutting and pointed tooth tips.
3. Set the Carrier
Set the sun–planet center distance and the number of planets in the carrier.
a. Carrier Center Distance
This is the center distance between the Sun and Planet.
When you change it, choose how to adjust profile shifts across the set.
b. Number of Planet(s) in Carrier
Set how many planets are in the carrier. The minimum is 2.
Spacing and the tooth-number mounting condition limit the count.
4. Set Span Width
Span measurement is shown for Sun, Planet, and Internal.
Change profile shift to change the span value.
Enter a span value to set profile shift.
Use this for reverse engineering and inspection.
The tool sets the tooth count to the best default.
You can change the tooth count inside the valid range.
5. Select Backlash / Individual Tooth Thinning
Choose DIN for recommended allowances.
Choose Own Input to set tooth thinning per gear.
Values are shown separately for Sun, Planet, and Internal.
See Backlash for the calculation method.
6. Download
Download SVG or DXF from this panel.
Choose the Sun, Planet, Internal gear, or the full geartrain.
Gear Blank is under development. It has basic features only.
Rack & Pinion Calculator
Open the Rack & Pinion Calculator from Product in the header. The pair is a helical rack (gear 1) and pinion (gear 2). Switch tabs to edit each member. Module, pressure angle, helix angle, and handing stay in sync.
Rack length and tooth count stay linked through transverse pitch. Pitch-line space equals tooth thickness. Depth follows ISO 53 Type B (same hob factors as the other calculators). Use 2D for the transverse mesh and 3D for the helical bar.
Download matches the other calculators: SVG/DXF in 2D, STEP/STL/GLB in 3D. Choose the rack, the pinion, or the full pair.